How to integrate your custom AI ChatGPT bot, trained on your data, into your WordPress website.
If you're looking to add a personalized ChatGPT bot to your Webflow website, ChatwithMyWebsite is a great choice. It offers an intelligent chatbot solution that enables the creation of a personalized AI chatbot trained with your own data. This means that when someone visits your website, whether they are a visitor or a potential customer, the chatbot can assist them in finding the information they need. Additionally, it can address intricate inquiries related to any subject covered on your website or within existing help materials. By delivering tailored AI solutions, It strives to enhance information management, boost productivity, and simplify everyday life. The convenience is unmatched, as you can embed the chatbot onto your website with a simple copy-paste of the embed code. Here's a quick guide on embedding your custom ChatGPT bot using ChatwithMyWebsite.
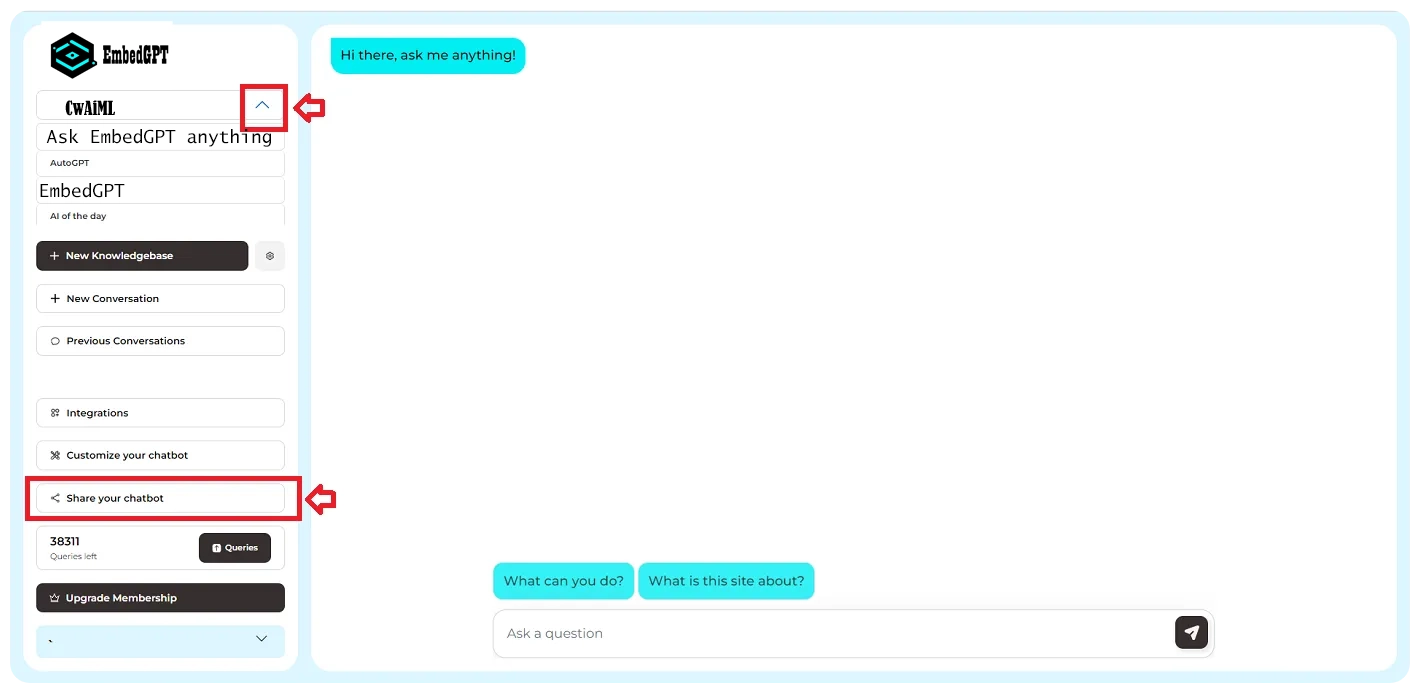
1- Log in to your ChatwithMyWebsite account.
2- Click the dropdown menu to select the bot you want to add
to your website.
3- Click the 'Share your chatbot' option and copy
the embed code.

4- Next, navigate to your WordPress dashboard and click on the ‘pages’ option.
5- Now, choose the page where you want to add the chatbot. At the
bottom of the page, type '/' to bring up the block
selector, and then select 'Custom HTML’.
6.
Finally, paste the ChatwithMyWebsite code snippet and update the
page to save your changes.
Note-
With this plugin, you can embed your ChatwithMyWebsite chatbot
directly into your WordPress site with very little effort.
ChatGPT Wordpress Plugin